

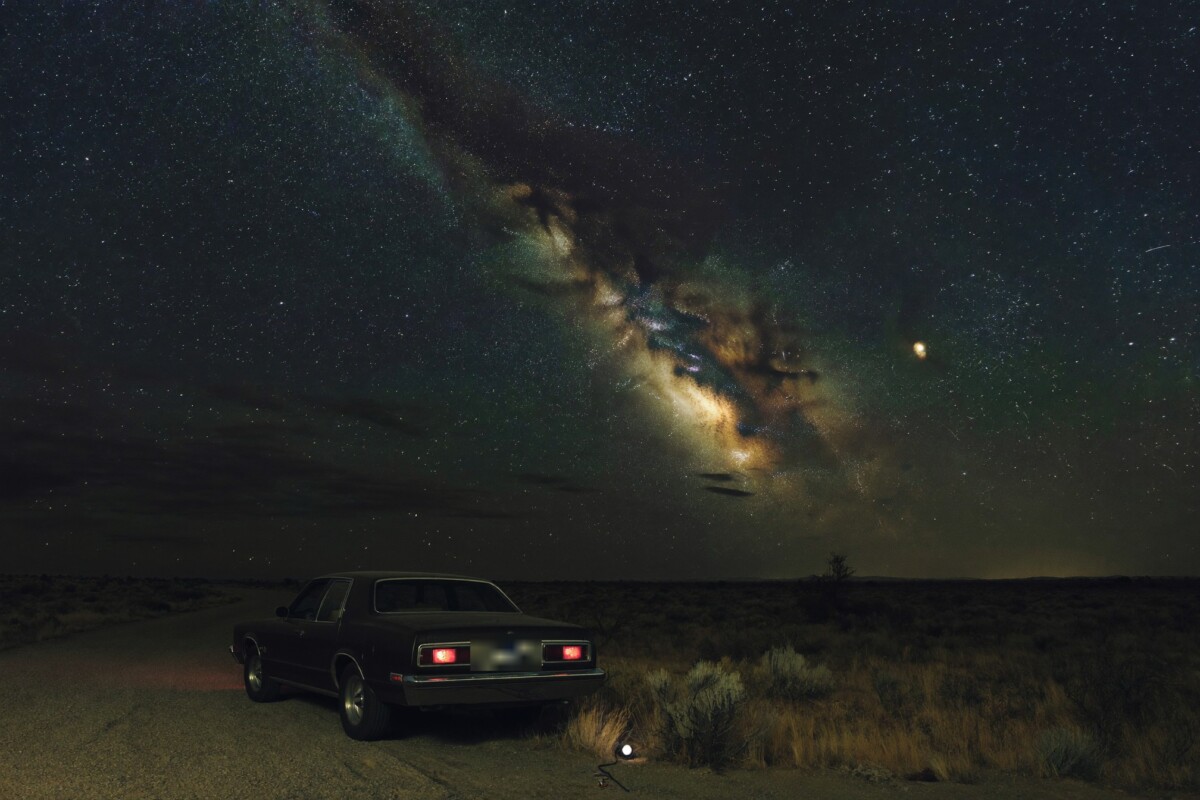
Quick answer: To find a dark sky site near you: open a light pollution map and locate your home, shortlist three candidate spots within about an hour’s drive, vet each one in daylight, then go on a moonless night. That four-step method finds a site you will actually use — which is worth far more than the perfect site you visit once and never return to.
Almost every guide to this question hands you a map and stops. A map tells you where the sky is dark. It does not tell you whether the spot is legal to park in, whether a security light points straight at it, whether the gate locks at dusk, or whether you can turn a car around in the dark. Those are the things that decide whether a site works. This guide from Telescope School covers the whole process, from the first look at a map to the etiquette once you are standing there.
Last Updated: September 2026 | Will Montgomery observes with an Astronomers Without Borders 130mm reflector and a 9mm Plössl, and writes Telescope School to give beginners the realistic version of what a telescope shows.
Step 1 — Put Your Home on a Light Pollution Map
Start by finding your own house on a light pollution map and reading your current Bortle class. Everything else is measured against that baseline.
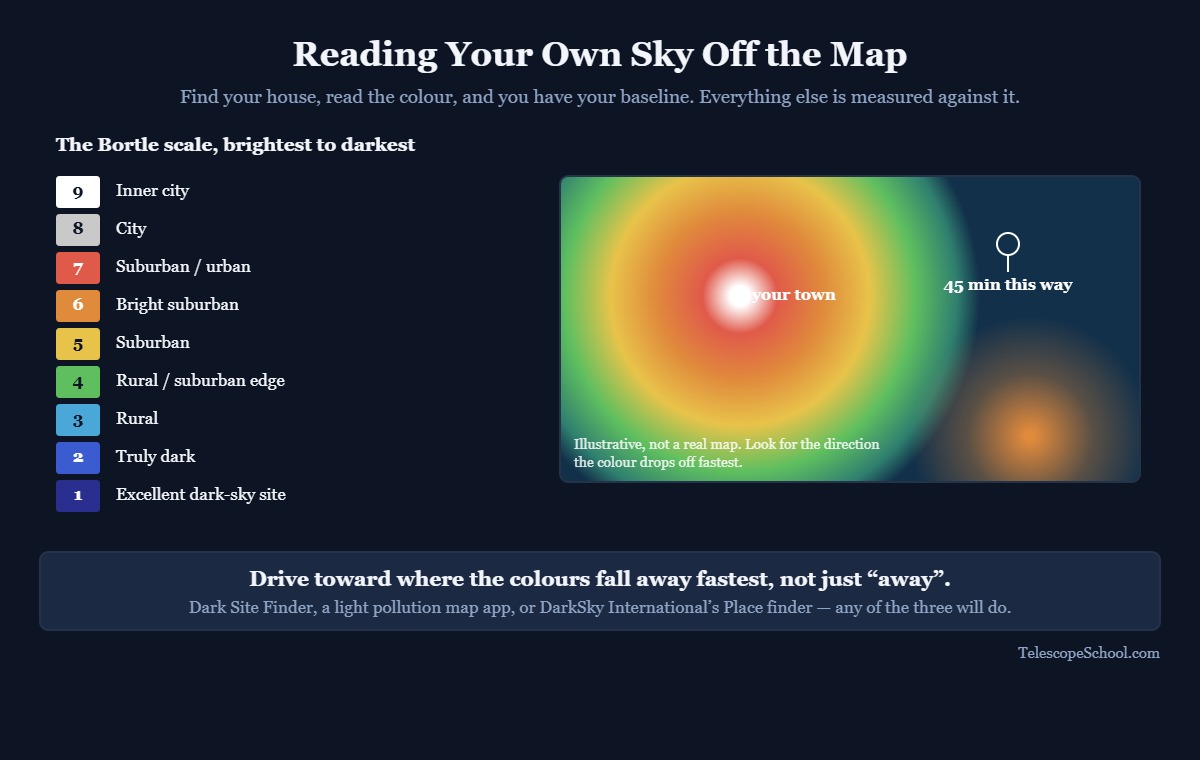
Three tools do the job, and they overlap enough that you only need one:
- Dark Site Finder — a straightforward overlay map with selectable data layers for 2006, 2016, 2020 and 2022, which is useful for seeing how a nearby town’s glow has changed over time.
- Light pollution map apps — several free web maps will centre on your approximate location and give you the Bortle class directly.
- DarkSky International’s Place finder — the official directory of certified sites, covered in Step 3.
Read the colour bands rather than hunting for a single number. What you are looking for is the direction of the nearest large gradient: which way you have to travel to get from your colour band to the next one. That direction, not the absolute darkest point on the map, is your search corridor.
If the Bortle scale is new to you, our explanation of the Bortle scale covers what each class actually means at the eyepiece, and how dark is the sky above your telescope covers measuring it yourself.
Step 2 — How Far Do You Actually Have to Drive?
For most suburban observers, the first 30 to 45 minutes of driving buys the biggest single improvement, and the gains flatten out sharply after that.
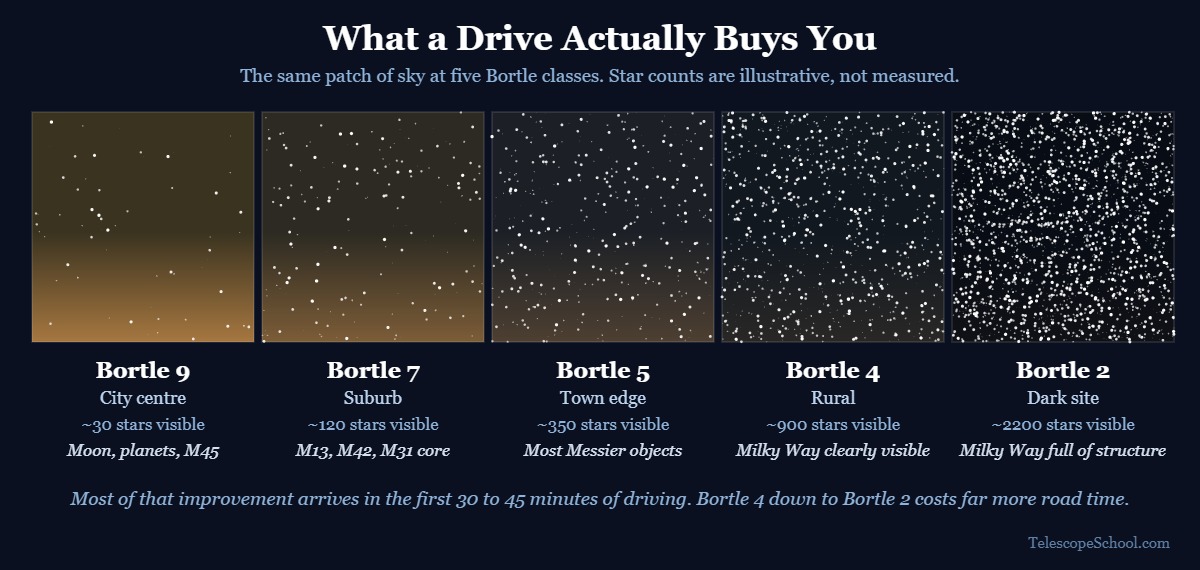
The reason is how skyglow falls off with distance. Getting out from under a city’s direct dome is a large, fast improvement. Getting from a rural Bortle 4 sky to a genuinely pristine Bortle 2 sky often means hours of driving, because you are now escaping the combined glow of every town for a hundred miles.
That has a practical consequence worth stating plainly: the drive you will repeat beats the drive you will make once. A Bortle 4 site 35 minutes away that you visit twelve times a year will show you far more of the sky than a Bortle 2 site three hours away that you visit twice. Build your search around what fits into an ordinary evening.
From experience: count the loading and unloading, not just the driving. Once I have the scope in and out of the car, getting to a darker site runs to about an hour for me — and that is the number that decides whether a site gets used on a weeknight or not.
Step 3 — Shortlist Three Candidate Sites
Aim for three, not one. Sites fail for boring reasons — a locked gate, a new light, a car already parked there — and having alternatives is what stops a wasted evening.
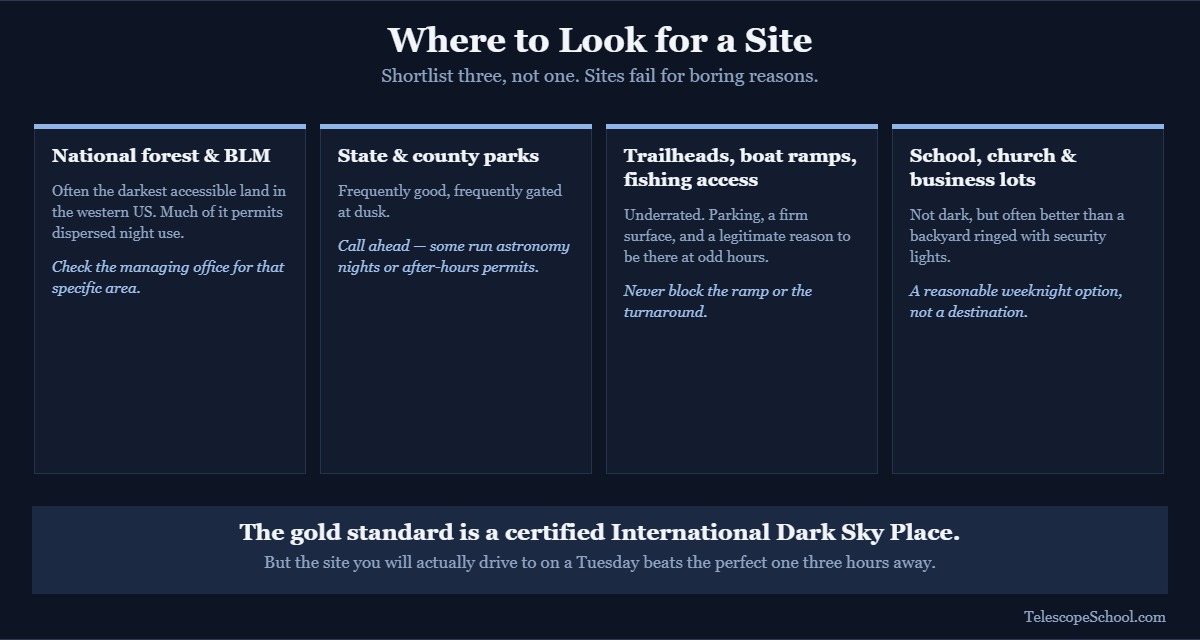
Public land is where to look first:
- National forest and Bureau of Land Management land. Often the darkest accessible land in the western United States, and much of it permits dispersed night use. Check the managing office’s own guidance for the specific area.
- State and county parks. Frequently good, frequently gated at dusk. Worth calling ahead — some run designated astronomy nights or issue after-hours permits.
- Trailheads, boat ramps and fishing access points. Underrated. They have parking, a firm surface and legitimate reasons to be there at odd hours.
- School, church and business lots on the edge of town. Not dark, but sometimes a big improvement over a backyard with neighbouring security lights, and a reasonable weeknight option.
The gold standard is a certified International Dark Sky Place. DarkSky International certified its 250th such place — Lapalala Wilderness Nature Reserve in South Africa — in an announcement dated 5 November 2025, and the programme now protects more than 160,000 square kilometres across 22 countries on six continents. The first International Dark Sky City was Flagstaff, Arizona, designated in 2001. These sites have both genuinely dark skies and lighting policies in place to keep them that way, and many actively welcome astronomers.
Access rules, fees and hours at any specific park or reserve change regularly, so confirm them with the managing authority rather than trusting a list — including this one.
Step 4 — Vet Each Site in Daylight First
Drive to each shortlisted site in daylight before you ever go there at night. This one habit prevents most of the things that ruin a first visit.
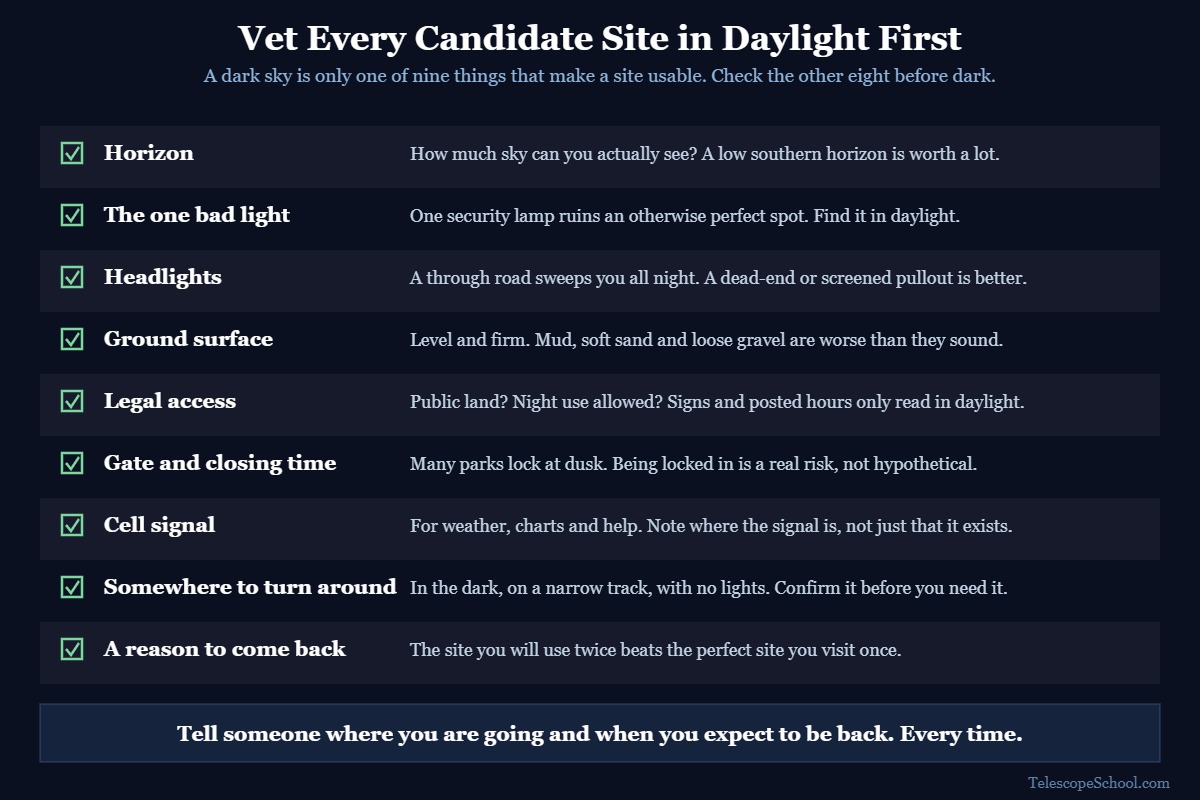
Two of these deserve extra emphasis. Horizon matters more than people expect — a site with a clean, low southern horizon will show you summer globulars and the Lagoon Nebula that a darker site hemmed in by trees simply cannot. And the single bad light is the most common reason a promising spot turns out to be useless. One gate lamp in your field of view will do more damage to your dark adaptation than a whole town on the horizon.
Step 5 — Pick the Night
Aim for the week around New Moon, then check the forecast for transparency as well as cloud.
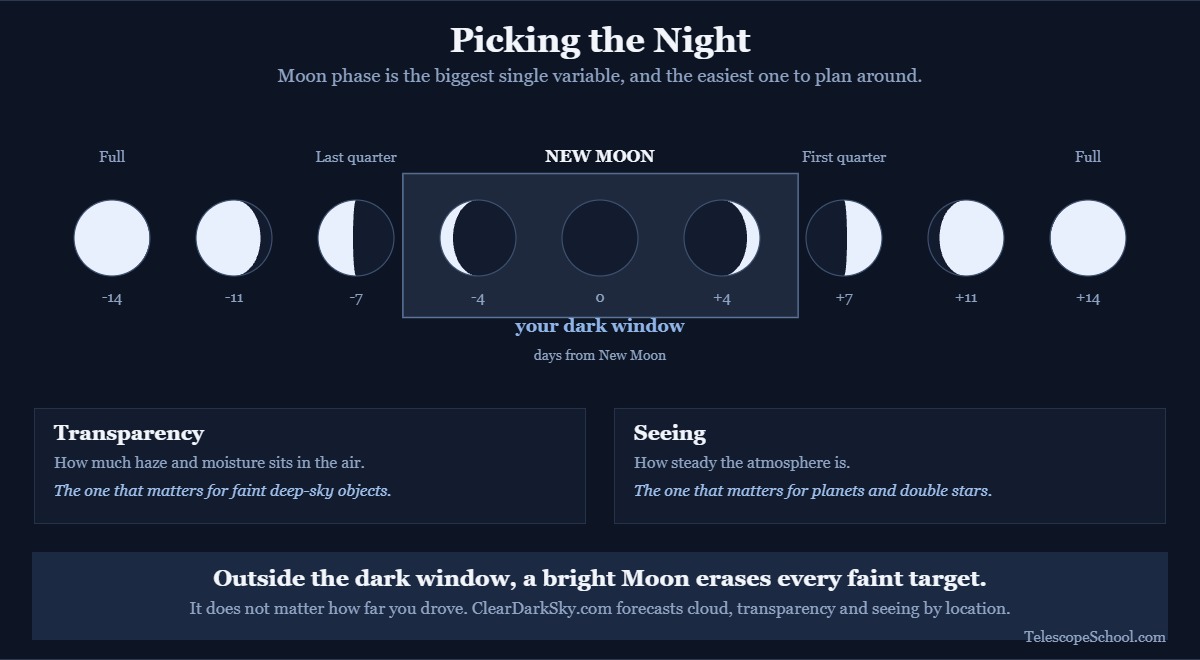
Moon phase is the biggest single variable and the easiest to plan around. The nights from a few days after last quarter through to a few days after new are your dark window. Outside it, a bright Moon will erase every faint target regardless of how far you drove.
Clear sky charts, such as those published at ClearDarkSky.com, forecast cloud cover, transparency and seeing for thousands of specific North American locations. Learn the difference between the last two: transparency is how much haze and moisture sits in the air, and it is what matters for faint deep-sky objects. Seeing is atmospheric steadiness, and it matters for planets and double stars. A night can be excellent for one and poor for the other.
Dew point is the forgotten one. A night with the temperature forecast to fall close to the dew point will fog your optics within an hour or two, and dew does not care how dark the sky is. Our guide to telescope dew control covers the fix.
Safety and Etiquette at a Dark Site
Standing in the dark, alone, in an unfamiliar place, with expensive equipment, is a set of circumstances worth taking seriously.
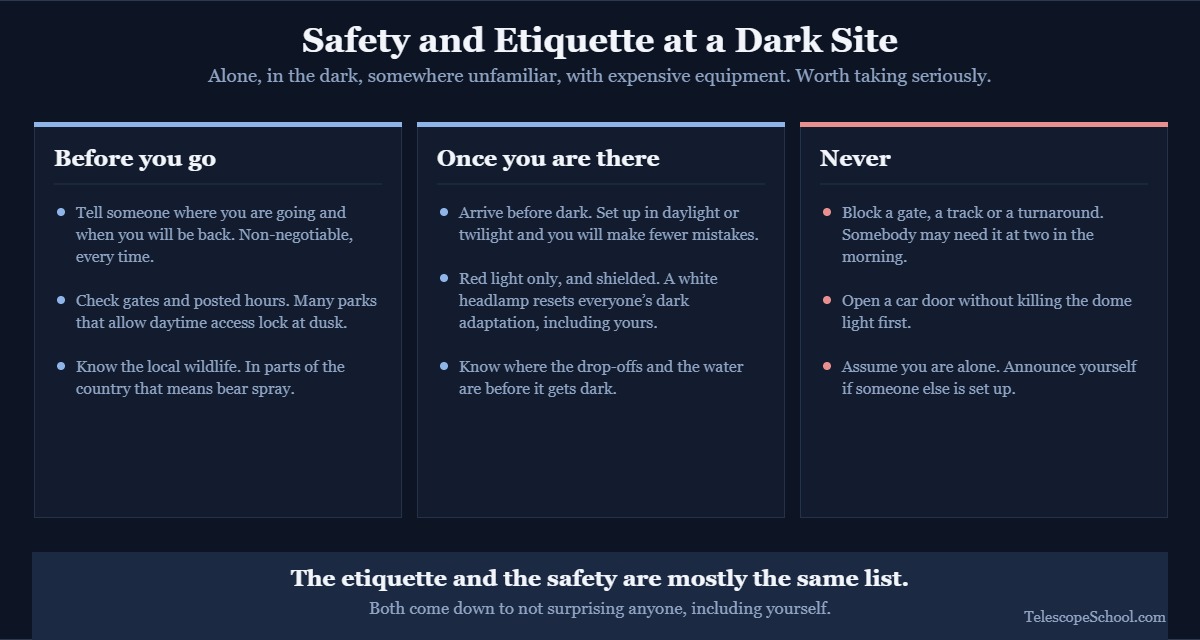
- Tell someone where you are going and when you will be back. Non-negotiable, every time.
- Arrive before dark. Set up in daylight or twilight. You will make fewer mistakes, you will not need white light, and you will see the site as it actually is.
- Red light only, and shielded. This is both a safety habit and a courtesy. A white headlamp resets the dark adaptation of everyone present, including yours. Our guide to red flashlights covers what to look for, and a dimmable red astronomy headlamp like the Apertura Ember is the one accessory genuinely worth buying before a first dark-site trip. Amazon carries plenty of cheaper red headlamps and handheld red flashlights if you would rather start small.
- Know the local wildlife and terrain. In parts of the country that means carrying bear spray. Everywhere it means knowing where the drop-offs and the water are before it gets dark.
- Never block a gate, a track or a turnaround. Somebody may need it at two in the morning.
- Leave no trace. Pack out everything, including the things that fall out of a pocket in the dark. Sweep the site with a light before you leave.
- Be ready to leave. If a site feels wrong, it is wrong. Go to the second name on your shortlist. That is what the shortlist is for.
The Shortcut — Join a Club Star Party
Local astronomy clubs have already solved this problem, and most run public observing nights at sites they have spent years vetting.
The advantages are real. The site is known to be dark, accessible and safe. Permission has already been arranged. There are other people there, which handles the safety question entirely. And you get to look through half a dozen telescopes before deciding what to buy next. For a beginner, one club star party is worth several solo trips.
Clubs also know things no map can tell you: which county road gets closed in winter, which farmer minds and which does not, and which pullout has quietly acquired a new light.
From experience: my work property is a real improvement over my own yard, but the nearest genuinely dark sky is up in northern Pennsylvania. The catch in this state is humidity — early spring and autumn are realistically the only times the air is clear enough to make that drive pay off. Winter works too, but I stay home when it is cold.
Frequently Asked Questions
How do I find a dark sky site near me?
Open a light pollution map such as Dark Site Finder, locate your home and note your Bortle class, then look for the direction in which the map gets darker fastest. Shortlist three public-land spots in that direction within about an hour’s drive, visit each in daylight to check horizon, lighting, access and parking, then go back on a moonless night.
How far from a city do you have to go for dark skies?
For most suburban observers, 30 to 45 minutes of driving away from the city centre produces the largest single improvement — typically moving you from a Bortle 7 sky to a Bortle 4 or 5. Beyond that, gains come much more slowly, because you are escaping the combined glow of many distant towns rather than one nearby city.
What is an International Dark Sky Place?
It is a site certified by DarkSky International for both its sky quality and its lighting policies. The 250th was certified in an announcement dated 5 November 2025, and the programme covers more than 160,000 square kilometres in 22 countries. Flagstaff, Arizona became the first International Dark Sky City in 2001. Certification means the darkness is actively protected rather than incidental.
Is it legal to stargaze in a park at night?
It depends entirely on the park and the managing authority, and many parks that allow daytime access do lock their gates at dusk. Check posted hours and the managing agency’s rules before your first night visit, and call ahead where you can — some parks issue after-hours permits for astronomy specifically. Do not assume that public land means unrestricted night access.
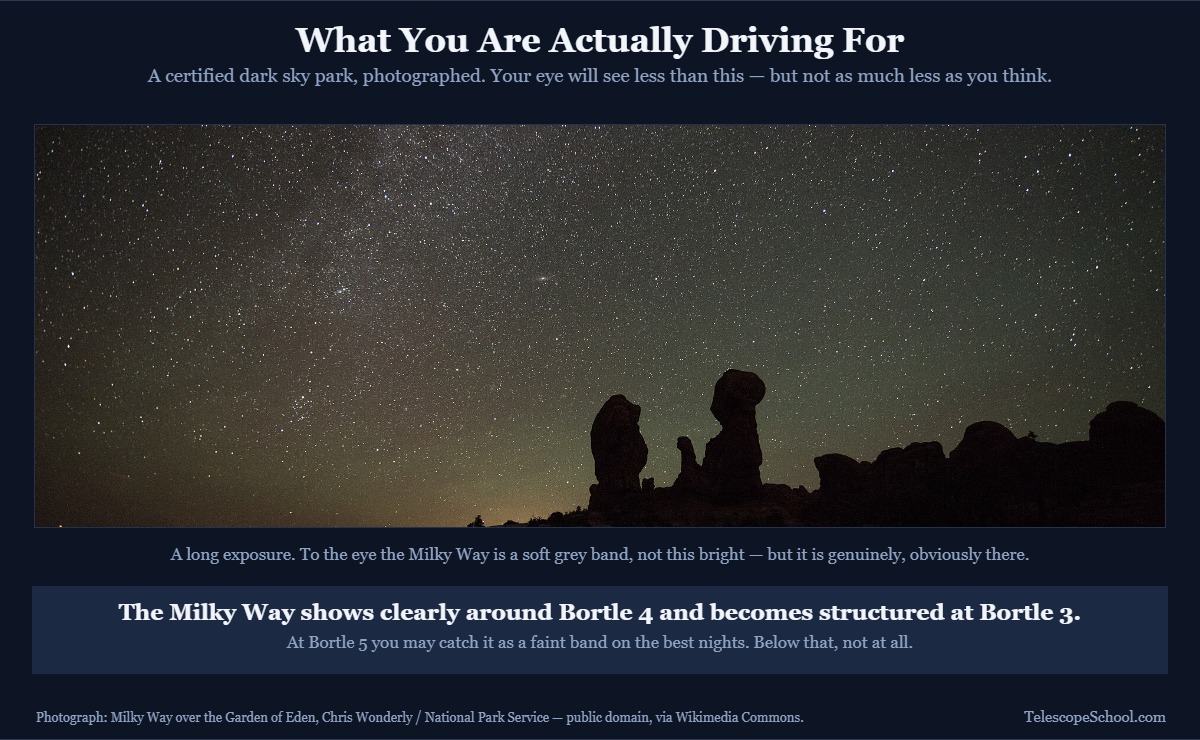
What Bortle class do I need to see the Milky Way?
The Milky Way generally becomes clearly visible around Bortle 4 and becomes genuinely structured and impressive at Bortle 3 and below. At Bortle 5 you may catch it as a faint band on the best nights, and from Bortle 6 or brighter it is usually invisible. For most people that means one drive out of town, not a wilderness expedition.
The Short Version
- Map first, then shortlist three, then vet in daylight. Skipping the daylight visit is what turns a promising site into a wasted night.
- Optimise for a drive you will repeat. A decent site 35 minutes away beats a perfect site three hours away.
- Find your local astronomy club. One star party saves you months of solo trial and error.
Once you have a site, the next question is what to point the telescope at. Our complete Messier catalog guide for beginners is the standard first project, and if you are still observing mostly from home, our list of the best objects for light-polluted skies will keep the backyard nights productive in between trips.
My own sky is Bortle 5-6 in suburban York, Pennsylvania, so the trade-off between drive time and sky quality is one I have had to work out for myself.
These May Help Too...
Can You Use a Telescope Through a Window? (And Why You Should Not)
Using a telescope through a window ruins the view: bad glass, heat currents and reflections. Here is what actually happens, and what to do instead.
Telescope will not come to focus? The cause is almost always spacing, not optics. Work out whether you ran out racking in or out, then fix that end.