

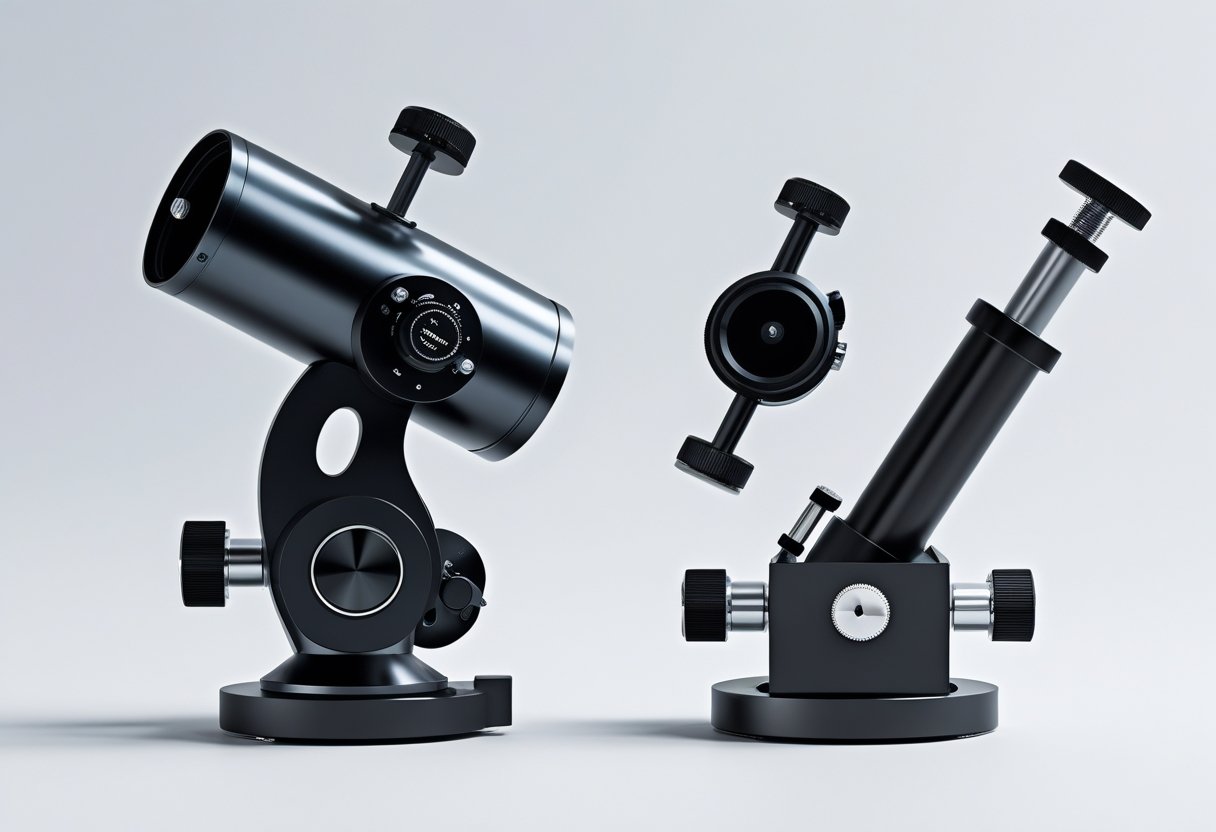
Telescope mounts represent one of the most critical decisions in amateur astronomy, directly affecting observation quality and user experience. The two primary mount types – equatorial and alt-azimuth – each offer distinct advantages that cater to different astronomical pursuits and skill levels.
Alt-azimuth mounts provide simplicity and ease of use for beginners, while equatorial mounts offer precise tracking capabilities essential for serious observation and astrophotography. The choice between these systems impacts everything from initial setup time to long-term observational capabilities.
Understanding the fundamental differences in movement patterns, tracking accuracy, and operational requirements helps astronomers select the mount that aligns with their specific goals and experience level. Each mount type excels in particular scenarios, making the selection process crucial for maximizing telescope investment and observational success.
Last Updated: May 2026 | Will Montgomery is an amateur astronomer who has personally set up and used both equatorial and alt-azimuth mounts for visual observing and astrophotography.
Understanding Equatorial and Alt-Azimuth Mounts
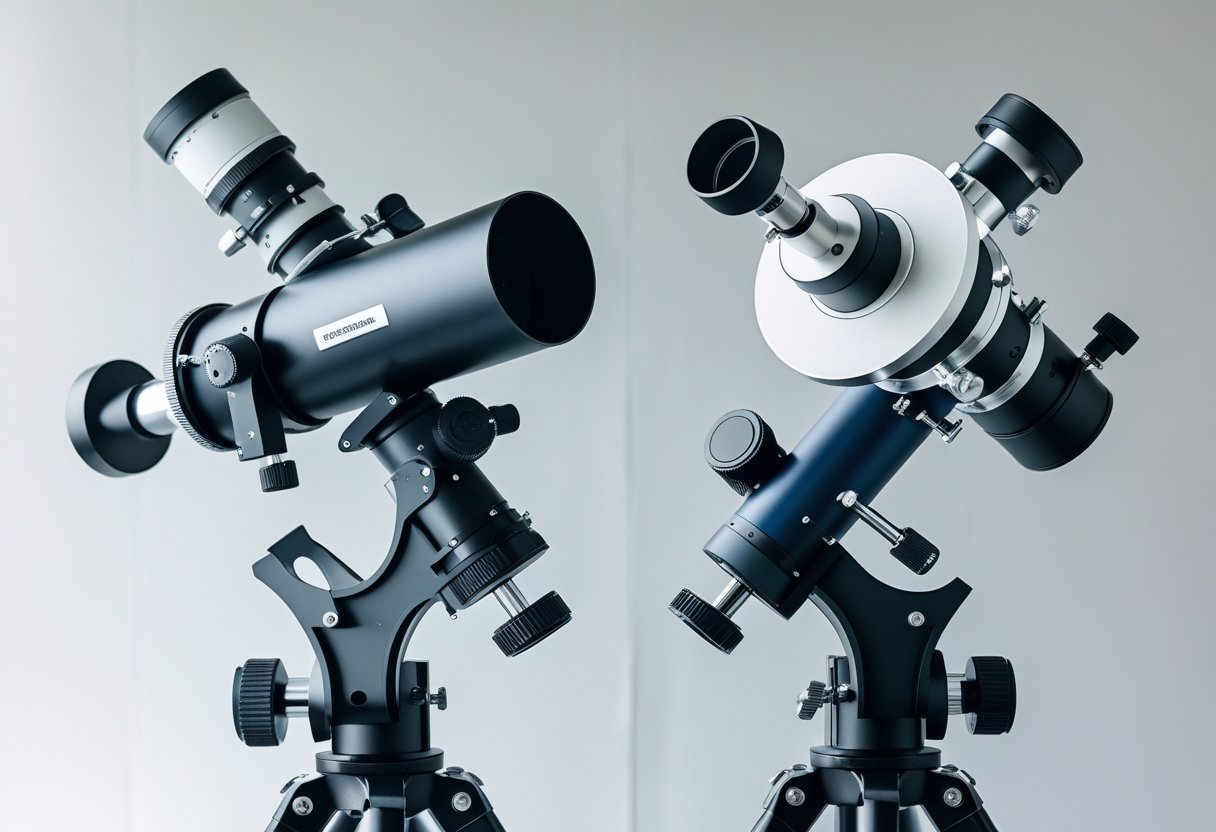
Alt-azimuth mounts move in simple up-down and left-right motions, while equatorial mounts align with Earth’s rotation to track celestial objects automatically. Equatorial mounts use a coordinate system based on right ascension and declination rather than earthbound directions.
What Is an Alt-Azimuth (Alt-Az) Mount?
An alt-azimuth mount operates on two perpendicular axes that mirror natural human observation patterns. The altitude axis controls up and down movement, while the azimuth axis handles left and right motion.
This mount type moves in directions relative to the observer’s horizon. Up and down follows the altitude axis from 0° at the horizon to 90° at the zenith overhead.
Left and right movement occurs along the azimuth axis, measured in degrees around the horizon. North typically serves as the 0° reference point.
Alt-azimuth mounts require no polar alignment or complex setup procedures. Users simply place the telescope on the mount and begin observing immediately.
The mount’s simple design makes it cost-effective and user-friendly for beginners. However, celestial objects will drift out of view as Earth rotates, requiring manual adjustment in both axes.
Common alt-az variations include:
- Dobsonian mounts (rocker box design)
- Fork mounts
- Computerized alt-az mounts with GoTo capability
What Is an Equatorial (EQ) Mount?
An equatorial mount aligns one axis parallel to Earth’s rotational axis, enabling single-axis tracking of celestial objects. The polar axis points toward the celestial pole, while the declination axis remains perpendicular to it.
This design compensates for Earth’s rotation through movement along the polar axis only. Objects maintain their position in the eyepiece without the field rotation that occurs with alt-azimuth tracking.
Equatorial mounts require polar alignment during setup. The polar axis must point accurately toward the celestial pole for proper tracking performance.
The mount uses celestial coordinates rather than horizon-based directions. Right ascension corresponds to the polar axis, while declination aligns with the perpendicular axis.
Key equatorial mount types:
- German Equatorial Mount (GEM)
- Fork equatorial mount
- Wedge-mounted fork mount
Professional observatories and serious astrophotographers prefer equatorial mounts for their precise tracking capabilities. The single-axis drive motor maintains object positioning for extended observation or imaging sessions.
RA/Dec in Plain English
Right Ascension (RA) and Declination (Dec) form the celestial coordinate system used by equatorial mounts. This system projects Earth’s latitude and longitude onto the celestial sphere.
Declination measures angular distance north or south of the celestial equator. It ranges from +90° at the north celestial pole to -90° at the south celestial pole.
Right Ascension measures eastward distance along the celestial equator from the vernal equinox point. RA uses time units: hours, minutes, and seconds, with 24 hours completing a full circle.
The celestial equator sits directly above Earth’s equator, projected into space. Objects with 0° declination lie on this celestial equator line.
RA coordinates remain fixed relative to the stars, unlike earthbound coordinates that change as the planet rotates. An object at RA 12h 30m retains this coordinate regardless of observation time or location.
Coordinate examples:
- Polaris: RA 2h 31m, Dec +89° 16′ (near north celestial pole)
- Sirius: RA 6h 45m, Dec -16° 43′ (southern of celestial equator)
- Vega: RA 18h 37m, Dec +38° 47′ (northern hemisphere object)
How Each Mount Works: Movement and Operation
Alt-azimuth mounts move in two straightforward directions that mirror natural human movement, while equatorial mounts require initial polar alignment but offer simplified tracking once properly set up. Both mount types have distinct operational requirements for achieving stable, vibration-free viewing.
How Alt-Az Moves and Why It Feels Intuitive
Alt-azimuth mounts operate on two axes that correspond to natural human movement patterns. The azimuth axis rotates the telescope horizontally left and right, while the altitude axis tilts it up and down vertically.
This movement system matches how people naturally point at objects in the sky. When someone wants to show another person a star, they instinctively move their arm left or right, then up or down.
Movement characteristics:
- Azimuth motion: 360-degree horizontal rotation
- Altitude motion: Vertical movement from horizon to zenith
- Control method: Two separate slow-motion knobs or motorized controls
The intuitive nature eliminates confusion for beginners. Users can immediately understand which control moves the telescope in which direction without consulting manuals or learning coordinate systems.
Tracking celestial objects requires continuous adjustment of both axes as Earth rotates. Stars appear to move in curved paths across the sky, necessitating simultaneous azimuth and altitude corrections.
Learning Curve: Balance and Basic Polar Alignment
Equatorial mounts demand initial polar alignment to function effectively for tracking. The right ascension axis must point toward the celestial pole, requiring users to understand basic astronomy concepts.
The learning process involves identifying Polaris in the Northern Hemisphere. Users must adjust the mount’s latitude setting to match their geographic location and orient the polar axis correctly.
Basic polar alignment steps:
- Level the tripod using bubble levels
- Point the mount toward true north
- Adjust altitude to match local latitude
- Fine-tune using Polaris position
Balance becomes critical with heavier telescopes. The telescope tube must balance on both the right ascension and declination axes to prevent motor strain and ensure smooth operation.
Most beginners require several sessions to master polar alignment basics. The process becomes routine with practice, but initial setup takes longer than alt-azimuth mounts.
Alt-Az: Leveling, Balance, Vibration Control
Alt-azimuth mounts require precise leveling to function properly. An unlevel mount causes tracking errors and makes finding objects more difficult during extended observations.
Leveling requirements:
- Tripod legs adjusted for level base
- Built-in bubble levels on mount head
- Fine adjustments using leg extensions
Balance involves positioning the telescope tube so weight distributes evenly. Front-heavy or back-heavy configurations cause the mount to drift and create vibrations during observations.
Vibration control focuses on rigid connections and dampening mechanisms. Loose bolts or inadequate tripod stability amplify small movements into image shake.
The telescope’s center of gravity should align with the mount’s bearing points. Heavy eyepieces, cameras, or finder scopes shift this balance and require counterweight adjustments or repositioning.
EQ: Quick Polar Alignment (No Gadgets)
Equatorial mounts allow rapid polar alignment using simple visual methods without electronic devices. The drift alignment technique provides accuracy sufficient for most visual observations.
Users can achieve basic alignment by pointing the mount at Polaris and adjusting until the star remains centered during short tracking periods. Fine-tuning involves observing star drift patterns.
Quick alignment method:
- Point polar axis at Polaris
- Start tracking a star near celestial equator
- Observe drift direction over 2-3 minutes
- Adjust mount position to minimize drift
The mount’s built-in polar scope simplifies the process. These small telescopes show Polaris’s exact position relative to the true celestial pole, eliminating guesswork.
Once aligned, the mount tracks objects by rotating only the right ascension axis. This single-axis movement maintains objects in the eyepiece field for extended periods without constant manual adjustments.
Visual Performance and Use Cases
Alt-azimuth mounts excel for casual observation and planetary viewing, while equatorial mounts provide advantages for high-magnification tracking and extended observation sessions. The choice between mount types significantly impacts the visual experience depending on target objects and magnification levels.
Where Alt-Az Shines (Moon, Planets, Sweeping)
Alt-azimuth mounts perform exceptionally well for lunar observation at all magnification levels. The Moon moves slowly enough that observers can easily track it with simple nudges on both axes.
Planetary viewing benefits from alt-az simplicity. Jupiter, Saturn, and Mars remain centered with minimal adjustment effort during typical observation sessions lasting 15-30 minutes.
Wide-field sweeping represents alt-az territory. Star-hopping across constellations feels natural when moving in altitude and azimuth directions. The intuitive “up-down, left-right” motion matches how observers think about sky navigation.
Double star observations work well on alt-az mounts. These targets require precise centering but minimal tracking once positioned. The stationary nature of double stars suits the alt-az tracking approach.
Messier object hunting favors alt-az mounts. Moving between targets scattered across the sky becomes straightforward without worrying about counterweight positions or meridian flips.
Limits of Alt-Az (High Power Nudging, Field Rotation)
High-power tracking creates the primary alt-az limitation. At magnifications above 150x, objects drift diagonally across the field. Observers must constantly adjust both altitude and azimuth axes simultaneously.
This diagonal drift becomes exhausting during extended high-magnification sessions. Planetary observers often struggle to maintain smooth tracking at 200x and beyond.
Field rotation affects visual observers using high magnifications. Stars appear to rotate around the field center, making it difficult to maintain familiar orientation patterns.
The rotation becomes noticeable during observations lasting more than 10-15 minutes at magnifications above 100x. Experienced observers learn to recognize this rotation but newcomers find it disorienting.
Zenith dead zone creates practical problems. Alt-az mounts cannot track objects passing directly overhead. The mount must make rapid azimuth movements, causing tracking interruptions.
Low vs High Power Visual Performance
Low power observations (25x-75x) show minimal differences between mount types. Both alt-az and equatorial mounts handle wide-field views effectively with simple nudging required.
Alt-az mounts actually provide smoother low-power tracking. Single-axis movements often suffice for keeping targets centered during casual observation sessions.
Medium power (75x-150x) begins favoring equatorial mounts. Objects drift more noticeably on alt-az systems, requiring more frequent two-axis adjustments.
The transition zone around 100x magnification marks where equatorial advantages become apparent. Tracking smoothness improves noticeably with single-axis movement.
High power (150x+) clearly favors equatorial mounts. Alt-az diagonal drift becomes problematic for detailed planetary observation and double star splitting attempts.
| Magnification Range | Alt-Az Performance | EQ Performance |
|---|---|---|
| 25x-75x | Excellent | Excellent |
| 75x-150x | Good | Very Good |
| 150x+ | Fair | Excellent |
Why EQ Helps at High Magnification and Tracking
Single-axis tracking represents the fundamental equatorial advantage. Once polar aligned, objects move along the declination axis only, requiring movement in right ascension alone.
This single-axis movement feels natural and maintains consistent tracking rates. Observers develop muscle memory for smooth RA adjustments across different sky regions.
Extended observation sessions benefit significantly from equatorial tracking. Planetary observers can study surface features for 30-60 minutes without tracking frustration.
High-magnification planetary work becomes practical on equatorial mounts. Observing Jupiter’s Great Red Spot or Saturn’s Cassini Division requires steady, predictable tracking that EQ mounts provide naturally.
Motor drives integrate seamlessly with equatorial mounts. Adding tracking motors eliminates manual adjustments entirely, allowing pure focus on observation rather than mount operation.
Field orientation stability helps visual observers maintain reference points. Stars and planetary features maintain consistent positions relative to the eyepiece field edges throughout observation sessions.
Comparing Equatorial vs Alt-Az Mounts
Alt-azimuth mounts offer simplicity and lower costs while equatorial mounts provide superior tracking capabilities for astrophotography. The choice depends on your experience level and observing goals.
Equatorial vs Alt-Az: Side-by-Side Comparison
| Feature | Alt-Azimuth Mount | Equatorial Mount |
|---|---|---|
| Setup Time | 5-10 minutes | 15-30 minutes |
| Polar Alignment | Not required | Essential for tracking |
| Tracking Method | Two-axis movement | Single-axis movement |
| Price Range | $100-$800 | $200-$2000+ |
| Weight | Lighter | Heavier |
| Portability | Excellent | Good to Fair |
Alt-azimuth mounts move up-down and left-right, matching natural human movement patterns. They require no special alignment procedures and work immediately after assembly.
Equatorial mounts align with Earth’s rotational axis. The right ascension axis must point toward the celestial pole for proper tracking functionality.
Tracking Performance: Alt-az mounts need constant adjustment on both axes to follow celestial objects. Equatorial mounts track objects with rotation on a single axis once properly aligned.
Astrophotography Compatibility: Alt-az mounts cause field rotation during long exposures. Equatorial mounts eliminate this issue, making them essential for serious astrophotography work.
Learning Curve Differences
Beginners can operate alt-azimuth mounts within minutes of unpacking. The intuitive up-down and left-right movements require no special knowledge or training procedures.
Equatorial mounts demand understanding of celestial coordinates and polar alignment techniques. Users must learn to locate Polaris and adjust the mount’s polar axis accurately.
Time Investment: New users typically master alt-az operation in one session. Equatorial mount proficiency requires 3-5 practice sessions to achieve consistent polar alignment results.
Common Mistakes: Alt-az users rarely encounter setup errors. Equatorial mount beginners often struggle with improper polar alignment, leading to poor tracking performance and frustration.
Skill Development: Alt-az mounts teach basic telescope operation and sky navigation. Equatorial mounts develop advanced skills in celestial mechanics and precision instrument setup.
Decision Matrix: Pick Your Best First Mount
Choose Alt-Azimuth if you:
- Want immediate telescope use without setup complexity
- Plan primarily visual observations of planets and bright objects
- Need maximum portability for travel or storage
- Have a budget under $500 for the complete system
- Prefer simple maintenance and operation
Choose Equatorial if you:
- Plan to pursue astrophotography within the first year
- Want to track objects for extended viewing sessions
- Can dedicate time to learning proper setup procedures
- Have a dedicated observing location with stable ground
- Budget allows for higher initial investment
Experience Level Recommendations: Complete beginners benefit most from alt-azimuth simplicity. Experienced photographers or those with technical backgrounds can start with equatorial mounts successfully.
Budget Considerations: Quality alt-az mounts start at $150 while reliable equatorial mounts begin around $300. Factor in additional costs for polar alignment tools and counterweights for equatorial systems.
Setup, Portability, and Practical Usage
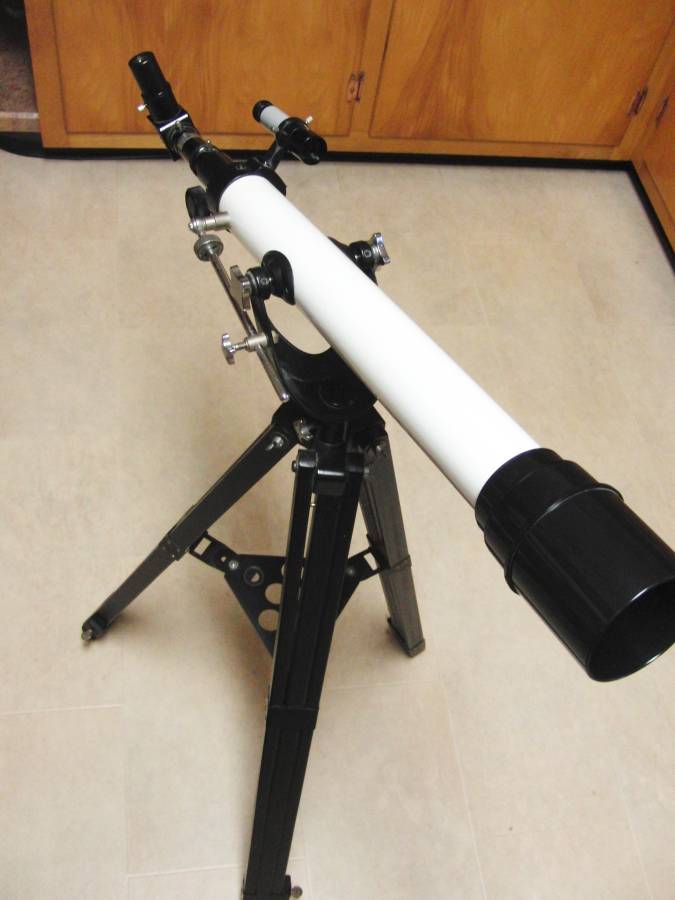
Alt-az mounts require minimal setup time with no polar alignment needed, while equatorial mounts demand precise polar alignment but offer better tracking capabilities. Weight distribution and tripod configuration affect comfort levels during extended observing sessions.
Setup Time and Portability
Alt-az mounts excel in quick deployment scenarios. Users can have them operational within 5-10 minutes since they require no polar alignment procedure. The mount simply needs leveling on its tripod.
Equatorial mounts demand 20-45 minutes for proper setup. Polar alignment involves positioning the mount’s polar axis parallel to Earth’s rotational axis. This process requires finding Polaris and making precise adjustments.
| Mount Type | Setup Time | Polar Alignment | Portability Weight |
|---|---|---|---|
| Alt-az | 5-10 minutes | Not required | Generally lighter |
| Equatorial | 20-45 minutes | Required | Heavier components |
Weight becomes crucial for portable astronomy. Alt-az mounts typically weigh 15-30% less than equivalent equatorial mounts. Their simpler mechanical design eliminates counterweight systems in many cases.
First-Night Setup Tips
For alt-az mounts, users should focus on achieving a level tripod base. A bubble level attachment helps ensure proper mount orientation. The telescope can be attached immediately after leveling.
For equatorial mounts, beginners should practice polar alignment during daylight hours. Mark tripod leg positions for future sessions at the same location. Use a polar alignment scope or drift alignment method for precision.
Start with rough polar alignment using a compass and latitude adjustment. Fine-tune using software tools or star drift methods. Keep adjustment tools easily accessible during setup.
Temperature changes affect alignment accuracy. Allow the mount to thermally stabilize for 15-20 minutes before final adjustments.
Comfort and Ergonomics (Chair Height, Tripod Spread)
Tripod height significantly impacts observing comfort. Standard tripods extend from 2.5 to 5 feet in height. Users should match tripod height to their standing eye level minus telescope tube diameter.
Chair selection depends on mount type and tripod configuration. Alt-az mounts with their simpler motion often work well with adjustable observing chairs. Equatorial mounts may require different chair heights as objects track across the sky.
Tripod leg spread affects stability and user movement around the telescope. Wider spreads increase stability but create trip hazards in darkness. A 4-foot diameter circle typically provides optimal balance.
Consider wheelchair accessibility when positioning tripods. Alt-az mounts generally offer easier access from seated positions since their controls remain at consistent heights during tracking.
Choosing a Mount for Different Needs
From experience: My first mount was an alt-azimuth — and honestly, most people’s first is, because of the cost savings. Mine came as a Christmas present. I still pull out a simple 5-inch tabletop Dobsonian when the grandkids visit… if they stay focused long enough!
Your observing goals determine which mount type serves you best. Alt-az mounts excel for casual planetary viewing, while equatorial mounts become essential for tracking and astrophotography applications.
Backyard Moon/Planets Most Nights
Alt-az mounts dominate this category for good reason. They set up in under five minutes without polar alignment requirements.
The moon and planets stay visible for hours during opposition. Manual tracking every few minutes works perfectly fine for these bright targets.
Key advantages for planetary observers:
- Immediate setup after work or school
- Intuitive up/down, left/right movements
- Lower cost entry point
- Stable viewing at high magnifications
Most planetary observers spend 30-60 minutes per session. Alt-az mounts handle this duration without tracking difficulties.
Recommended specifications:
- Minimum 20-pound payload capacity
- Smooth slow-motion controls on both axes
- Adjustable tension knobs
Popular models like the Celestron NexStar SLT or Orion SkyView Pro deliver excellent planetary performance. Manual Dobsonian mounts also excel for this application.
Star-Hopping and Learning Constellations
Alt-az mounts again prove superior for constellation exploration and star-hopping techniques. Their natural movement matches how observers learn the night sky.
Beginners find alt-az controls match their instincts. Moving “up toward Polaris” or “left toward Cassiopeia” feels natural compared to equatorial coordinates.
Star-hopping benefits:
- Intuitive navigation between star patterns
- Wide-field capability for constellation views
- Quick target acquisition without coordinate conversion
- Educational value for learning sky motions
Most star-hopping sessions involve frequent repositioning between targets. Alt-az mounts handle these movements efficiently.
Dobsonian telescopes particularly excel here. Their large apertures reveal faint deep-sky objects while maintaining simple operation.
Tracking considerations: Objects drift through the eyepiece every 2-4 minutes due to Earth’s rotation. This minor inconvenience rarely impacts casual observing sessions.
Planning for EAA/Astrophotography Later
Equatorial mounts become mandatory for electronic-assisted astronomy and astrophotography. These applications require precise tracking over extended periods.
EAA sessions typically run 1-3 hours per target. Even short 30-second exposures demand accurate tracking to prevent star trails.
Critical equatorial advantages:
- Sidereal tracking matches Earth’s rotation exactly
- Polar alignment enables hands-free operation
- GoTo accuracy for precise target centering
- Guiding compatibility for longer exposures
Mount requirements escalate significantly:
- Payload capacity: 1.5x telescope weight minimum
- Periodic error: Under 10 arcseconds peak-to-peak
- GoTo accuracy: 2-5 arcminute pointing precision
- Autoguiding ports: ST-4 or USB connectivity
Budget considerations: Quality equatorial mounts cost 2-3 times equivalent alt-az models. The Celestron Advanced VX represents the entry-level threshold for serious imaging.
Polar alignment necessity: Achieving 2-3 arcminute polar alignment accuracy requires 15-30 minutes setup time. This investment pays dividends during long imaging sessions.
Manual equatorial mounts work for EAA but limit session efficiency. Computerized models like the Sky-Watcher EQ6-R Pro provide the automation serious imagers require.
Accessories, Power, Budget, and Upgrades
Mount selection significantly impacts accessory requirements and power consumption, while budget considerations often determine whether users start with alt-azimuth mounts before upgrading to equatorial systems.
Power Needs and Accessories
Alt-azimuth mounts typically consume less power than equatorial mounts due to simpler motor systems. Basic alt-az models often run on standard AA batteries for several hours of operation.
GoTo alt-azimuth mounts require consistent power for dual-axis motors and computer systems. Users can expect 6-8 hours of operation on eight AA batteries or external 12V power supplies.
Equatorial mounts demand more power for polar alignment motors, declination drives, and Right Ascension tracking. Advanced models with autoguiding ports and multiple accessory connections increase power requirements further.
Essential accessories for alt-azimuth mounts:
- Hand controller (GoTo models)
- Power cables or battery packs
- Smartphone adapters for basic models
Essential accessories for equatorial mounts:
- Polar alignment scope or PoleMaster
- Counterweights and shaft extensions
- Autoguiding systems for astrophotography
- Heavy-duty tripods rated for mount capacity
External power sources become necessary for extended observing sessions. Car battery adapters and portable power stations provide reliable alternatives to disposable batteries.
Budget and Upgrade Path
Alt-azimuth mounts offer lower entry costs, with quality manual models starting around $200-400. Computerized GoTo versions range from $500-1200 for most amateur astronomy needs.
Equatorial mounts require higher initial investment, starting at $600-800 for basic models. Advanced astrophotography-capable mounts cost $1500-3000 or more depending on payload capacity.
The upgrade path typically follows a predictable pattern. Beginners start with alt-azimuth mounts for visual observing, then upgrade to equatorial systems when pursuing astrophotography or precise tracking.
Common upgrade timeline:
- Manual alt-azimuth mount ($200-400)
- GoTo alt-azimuth mount ($500-1200)
- Entry equatorial mount ($800-1500)
- Advanced equatorial mount ($2000+)
Used equipment markets provide cost-effective upgrade options. Quality mounts retain value well, making resale viable when upgrading to more advanced systems.
Budget allocation should reserve 30-40% of telescope investment for mount systems. Inadequate mounts limit telescope performance regardless of optical quality.
Common Mistakes and Troubleshooting
Both equatorial and alt-azimuth mounts suffer from similar user errors that can significantly impact observing performance. Mechanical handling issues, pursuit of excessive magnification, and environmental factors create the most frequent problems for telescope users.
Common Mistakes to Avoid
Improper polar alignment represents the most critical error with equatorial mounts. Many users rush through this process or skip it entirely, resulting in poor tracking performance and drift during observations.
Inadequate counterbalancing causes excessive strain on drive motors and gears. The telescope should remain stationary when clutches are loosened, requiring neither upward nor downward force to maintain position.
Forgetting to engage clutches after manual adjustments leads to slipping and lost targets. This mistake occurs frequently when switching between manual positioning and motorized tracking modes.
Using incorrect finder alignment wastes significant observing time. Finder scopes require precise alignment with the main telescope during daylight hours, not during nighttime sessions.
Forcing movements against mechanical limits damages mount components. Both mount types have physical stops that should never be exceeded through manual or motorized movement.
Overtight Clutches and Chasing Magnification
Excessive clutch tension creates several serious problems for both mount types. Overtightened clutches prevent smooth manual adjustments and can strip internal gears when motors attempt to move the telescope.
Proper clutch adjustment allows smooth movement with minimal backlash. Users should tighten clutches just enough to prevent slipping under the telescope’s weight while maintaining easy manual positioning.
Magnification limitations depend more on atmospheric conditions than telescope specifications. Beginners often pursue maximum magnification instead of optimal viewing conditions, resulting in dim, blurry images.
Practical magnification limits rarely exceed 200-250x for most observing conditions. Higher magnifications amplify atmospheric turbulence and mount vibrations, degrading image quality significantly.
Motor strain occurs when clutches are too tight for tracking systems to overcome. This leads to premature motor failure and inconsistent tracking performance.
Ignoring Seeing/Transparency and Vibration Control
Atmospheric seeing determines the maximum useful magnification regardless of mount type. Poor seeing conditions limit effective magnification to 100-150x, making high-power eyepieces useless.
Transparency issues affect object visibility more than mount precision. Hazy or light-polluted skies reduce contrast and detail visibility, particularly for deep-sky objects.
Vibration control requires attention to mount setup and environmental factors. Soft ground, wind exposure, and inadequate tripod extension create vibrations that overwhelm mount stability.
Proper setup techniques include:
- Extending tripod legs equally
- Positioning on firm, level ground
- Using vibration-damping pads
- Avoiding contact with the telescope during observations
Wind protection becomes critical for both mount types at higher magnifications. Even gentle breezes create significant image movement and focus shifts.
Frequently Asked Questions
Telescope mount selection involves understanding movement axes, tracking capabilities, and intended use cases. Cost considerations, setup complexity, and specific astronomical applications also influence the decision between these two mount types.
What are the primary differences between using an equatorial mount and an alt-azimuth mount for telescopes?
Alt-azimuth mounts move along two axes: altitude (up and down) and azimuth (left to right). These movements mirror natural human observation patterns, making them intuitive to operate.
Equatorial mounts align one axis with Earth’s rotational axis. This alignment allows for single-axis tracking of celestial objects as they move across the sky.
Alt-azimuth mounts require movement along both axes to track objects. Equatorial mounts need only rotation around the right ascension axis once properly polar aligned.
Setup complexity differs significantly between the two systems. Alt-azimuth mounts can be used immediately after assembly, while equatorial mounts require polar alignment procedures.
How do equatorial mounts assist with astrophotography compared to alt-azimuth mounts?
Equatorial mounts eliminate field rotation during long exposure photography. Objects remain properly oriented throughout extended imaging sessions without image distortion.
Alt-azimuth mounts introduce field rotation as they track objects. This rotation causes stars to appear as curved trails rather than point sources during longer exposures.
Single-axis tracking on equatorial mounts simplifies motorized systems. The mount only needs to rotate at the sidereal rate around one axis to follow celestial motion.
Dual-axis tracking on alt-azimuth mounts requires complex computer calculations. The mount must continuously adjust both altitude and azimuth axes at varying rates.
What types of celestial observations are alt-azimuth mounts most suitable for?
Visual observations of planets, moon phases, and bright deep-sky objects work well with alt-azimuth mounts. These targets remain visible long enough for comfortable viewing without complex tracking.
Wide-field observations benefit from the simple movements of alt-azimuth systems. Users can quickly scan across constellations and star fields without alignment constraints.
Terrestrial viewing applications favor alt-azimuth designs. The natural movement patterns suit daytime observations of landscapes, wildlife, and distant objects.
Short-exposure photography remains possible with alt-azimuth mounts. Images under 30 seconds typically show minimal field rotation effects.
Can you explain the advantages of an equatorial mount for tracking celestial objects?
Polar alignment enables automatic tracking with a single motor drive. Once aligned, the mount rotates at Earth’s rotational rate to counteract celestial motion.
Extended viewing sessions become more comfortable with equatorial tracking. Observers can study objects for long periods without manually adjusting the telescope position.
Precise object location improves through coordinate systems. Right ascension and declination coordinates directly correspond to the mount’s axis movements.
Mechanical tracking accuracy often exceeds computerized alt-azimuth systems. Simple gear trains and worm drives provide smooth, consistent movement rates.
What is a German Equatorial Mount, and how does it differ from standard equatorial mounts?
German Equatorial Mounts feature a counterweight system on the declination axis. This design balances telescope weight and reduces motor strain during tracking operations.
The counterweight shaft extends opposite to the telescope tube. This configuration allows telescopes to access most of the visible sky without obstruction.
Fork-mounted equatorial designs integrate the telescope between two support arms. These systems typically work better with shorter, compact telescope tubes.
German mounts accommodate longer refractor telescopes more effectively. The counterweight system handles extended tubes that would be difficult to balance in fork mounts.
For amateur astronomers, what considerations should be made when choosing the best equatorial mount?
Weight capacity must exceed the telescope and accessory load by at least 25 percent. Overloaded mounts produce vibrations and tracking errors that degrade observations.
Polar alignment accuracy requirements depend on intended applications. Visual observers need less precision than astrophotographers requiring long-exposure tracking.
Budget constraints often determine mount quality and features. Entry-level equatorial mounts may lack goto systems or precision components found in advanced models.
Portability needs affect mount selection for observers who travel to dark sites. Heavy German equatorial mounts may be impractical for frequent transport and setup.
I’ve set up on both mount types, so I compare equatorial and alt-azimuth from real time behind each — and say plainly which suits a beginner.
These May Help Too...
Can You Use a Telescope Through a Window? (And Why You Should Not)
Using a telescope through a window ruins the view: bad glass, heat currents and reflections. Here is what actually happens, and what to do instead.
Telescope will not come to focus? The cause is almost always spacing, not optics. Work out whether you ran out racking in or out, then fix that end.