

Quick answer: Most blurry telescope views come from one of six fixable causes — too much magnification, poor collimation, a misaligned finderscope, an extension tube or Barlow limiting focuser travel, a diagonal that is not seated, or optics that have not cooled to outdoor temperature. Start by lowering magnification and letting the scope cool 20–30 minutes.
Telescopes don’t have any moving parts really, but there is a lot to know about them to get the most out of them. Blurry views can be one of the most aggravating things after setting up for a beginner.
Top 6 Reasons a Telescope can Appear Blurry
- Too high of a magnification
- Collimation is off (reflector and Cassegrain styles)
- Finder Scope not actually aligned to the main scope
- An extension tube or Barlow limiting focuser travel?
- A diagonal not in place (mainly with some refractors)
- Trying to focus before temperature equilibrium.
OK, yes, It may seem obvious to some, but when you are first setting up and trying out for the first time, it can be a lot to remember. So, let’s see how to fix the top 6 reasons next.
The Top 6 Fixes for a Blurry Telescope
Too High of a Magnification Fix
There are several places where too high of a magnification can mess you up.
1.Any magnification over 200X may be blurry due to atmosphere conditions more so than a telescope problem. So, hot, humid summer nights, you will not get the same magnification as on a crisp fall night.
2. The higher magnification exaggerates everything – Example, looking through a window, you may be able to look at the moon through a window, but trying to magnify and see M31 (Orion Nebula). When magnified, the glass is distorting the dim light.
3. Setting up to view an object that is too close – Telescopes are designed to focus on infinity basically. So, trying to focus on a landscape object can limit the focus adjustment if too magnified.
But, How Do You fix The Above Magnification Problems?
Reduce the magnification; always start with your biggest eyepiece, and then magnify by progressing to smaller and smaller eyepieces, or by adding a barlow to increase focal length.
Either way, always start with a lower magnification eyepiece. Something like a 20mm to a 25mm will do the trick. Make sure there are no extension tubes or barlow’s in place.
Remember the rule of thumb: Useful magnification on a telescope is 2X its aperture in mm, and 50X in inches.
Don’t know what an aperture is? Check out this article, What is a Telescope Aperture, and What’s the Best Size.
Collimation is Off and the Fix for It
This only pertains to reflector and Cassegrain, however, it is often the gorilla in the room, so to speak.
Collimation is not hard, it just seems overwhelming when first starting out. It is just good practice to assume collimation is out every time you go to use your reflector telescope. Cassegrains need collimation less often, but should be checked once in a while.
Why Collimation Makes Your View Blurry
Anybody that has ever worn glasses can relate to this. While lifting the part of the glasses that sit on your ears and keeping them on your nose, you can still see, but not as good.
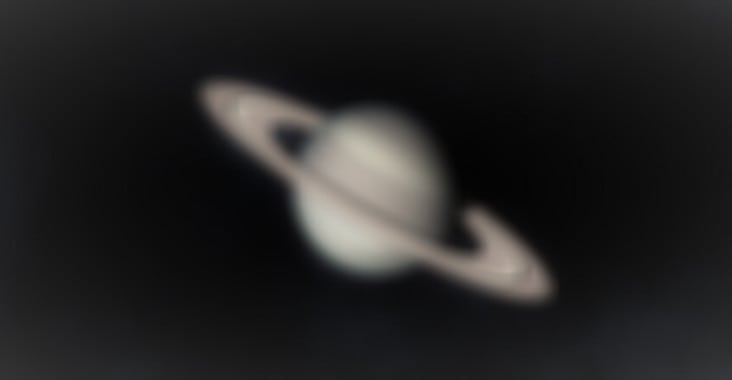
So, same with your telescope, if the mirrors are off a little bit and you try to magnify in on a distant object, will say Saturn, it just can’t get a crisp image compared to the moon.
This is because when you magnify, you are narrowing your field of view and exaggerating any misalignment. Just like above, start out with bigger focal length eyepieces and work in on smaller focal length eyepieces.
Collimation Quick Check
Take the eyepiece out and stare through like it was there. You should see your eye staring back at you. As a note: if it is not your own eye staring back, get rid of the telescope! (that is a bad joke by the way)
You can check your collimation with collimation tools, feel free to check out the abundance of tools and styles in all price ranges. They are easy to use and not hard to get the hang of. You can see what they are on Amazon for a quick glance to get an idea. More info on available collimation tools.
You can learn more about what is involved with a reflector telescope with this article as well, What is a Reflector Telescope.
Finderscope Not Actually Aligned to Main Telescope
This may seem like, duh? However, it made it here because of the nature of a telescope inverting your image, and the differences in magnification of the two scopes.
Say you’re looking at the moon, it is apparent that you need to adjust your knobs and bring the moon into a better view because it is so bright and large. You can tell you are almost on it.
However, looking at something farther away, you may not have it centered, and when you adjust the knobs, you lose it. This is more along the lines of not being able to find it. Still, you can sometimes try to focus on something that disappears when you focus because it isn’t lined up, but you can see it when it is out of focus and blurry.
To Fix, you just need to align your finderscope and telescope in the day on something as far away as possible, like a mile or more if you can.
To do this, find something with your telescope, then align your finderscope, and double-check it on a second object if possible. To learn more about how to align your finderscope, you can read this article on Setting Up Your Telescope for the First Time.
Extension Tube or Barlow Limiting Focuser Travel Fix
Barlows and extension tubes change the focal length of your telescope, which was designed to have focus ability. Still, when you change the focal length, you change your focus point.
In other words, having a barlow or extension tube in place may limit your ability of focus range and get to the focal point.
Also, sometimes they may actually extend into the telescope and physically limit the focus travel.
How to fix, Start without them in place.
A Diagonal Not in Place Fix
OK, you may be like…what? Everything to this point has been started without stuff in place and work up to extra power. Well, I know, however, some refractor scopes are designed with their focal point to include a diagonal.
This may seem counter-intuitive from what I have been saying. However, to get full focus adjustment, you may need a little bit more length to allow the light to get to the focal point where your eyepieces magnify. Otherwise, your eyepiece may not have enough travel to get close, or far enough away.
How to Fix: If you are starting with a 20mm and have a refractor, and still can’t focus, add a diagonal. This actually will most likely show up when you try to magnify. So if you have a refractor try adding a diagonal to see if it works. Especially if it came with one.
Trying to Focus Before Temperature Equilibrium Fix
OK, it sounds like dictionary words to explain the temperature of the telescope is not the same as the temperature of the air.
Three things could happen here,
1, A cold lens or mirror that is expanding on the outside edge before the inside mass can, is changing its curvature, thus distorting your view. Of course, it is changing its shape the whole time until it equalizes.
2, The cold lens is condensating moisture from the air and accumulating tiny water droplets distorting your view.
This happens when moving from the AC to warm, moist air.
3, The warm lens is expanding on the outside before the inside mass and changing its curve, and therefore making a distorted view.
How to Fix:
Give time for the mass of the lens or mirror to equalize. If you give the average beginner telescope 30 minutes, you should be good.
The actual time is directly related to the mass of the lens or mirror, and the difference in ambient temperature. The larger telescopes, like 6″ or 8″ and above, can take an hour or two to equalize.
Also, finding a cover for your telescope when moving it from indoors to outside can alleviate condensation build-up. I found that a thermal survival blanket helped with this problem. It blocked the moisture from the air, but the telescope still could acclimate.
If you want to see what I used from Amazon, click on Thermal Blanket.
The Overall Consensus on a Blurry View on Your Telescope
- If you went through the collimation process and are satisfied.
- Start with the largest number eyepiece you have.
- Let the telescope sit for 30 minutes or more.
- Removed extension tubes and barlow lenses.
- Added the original diagonal if it came with one (some refractor styles).
- Double checked the finderscope alignment.
It should work fine! Although you may want to check these things.
What Else to Double-Check
Check to make sure your focuser has full travel, and if present, there are no tensioning screws or knobs snugged down.
Are you wearing contacts or glasses? Try focusing with, or without your corrective wear on. Depending on if you’re near or far-sighted. Here is an article about corrective wear and how it can affect your telescope viewing.
Double-check for obstacles. At night it may be hard to notice a tree limb in the view of your telescope, for example. When looking through a finderscope, and especially standing and looking. The angle of view is different from your scope’s. Like the difference in perspective from your left eye to your right eye.
Other than that, I hate to say, wait and try again in the day time where you can see everything a little better and repeat the steps to see if you missed something.
If you can’t find anything, contact your technical support from the owner’s manual. Don’t dally on this, it should work for you like everyone else.
Need More?
I hope this article helped you discover any problem you may have been having. If it did help you in some way, maybe one of these articles may help you as well.
30 Quick Tips and Tricks for Improved Telescope Viewing
Telescope Filters, Which Ones to Use and Where
The 10 Best Barlow Lenses, and Why I’d Buy Them
Frequently Asked Questions
Why is my telescope blurry no matter how I focus?
Usually too-high magnification or optics that have not reached temperature. Drop to a lower-power eyepiece and let the scope cool outside for 20–30 minutes.
Can bad collimation cause a blurry telescope?
Yes. On reflectors, mirrors knocked out of alignment (collimation) blur every view. Recollimating usually restores sharp focus.
Why can’t I reach focus with my Barlow or extension tube?
Added tubes change the focuser’s travel range. Remove the Barlow or extension, or adjust focuser position, until the image snaps into focus.
Does the atmosphere make a telescope blurry?
Yes — turbulent air (poor seeing) blurs high-power views even with perfect optics. Lower the magnification or wait for a steadier night.
Will Montgomery explains how to fix blurry views — from scope cooling to collimation — based on years of helping beginners see clearly.
These may help...
How to Collimate Reflector Telescope: Precision Alignment Guide
Learn how to collimate a reflector telescope step by step — from centering the secondary mirror to nailing primary alignment — so your views are sharp every time.
Can't See Anything Through Telescope? Clear Solutions for Sharper Views
Can't see anything through your telescope? This guide walks through every common cause — from caps and focus to collimation — with clear fixes for beginners.