

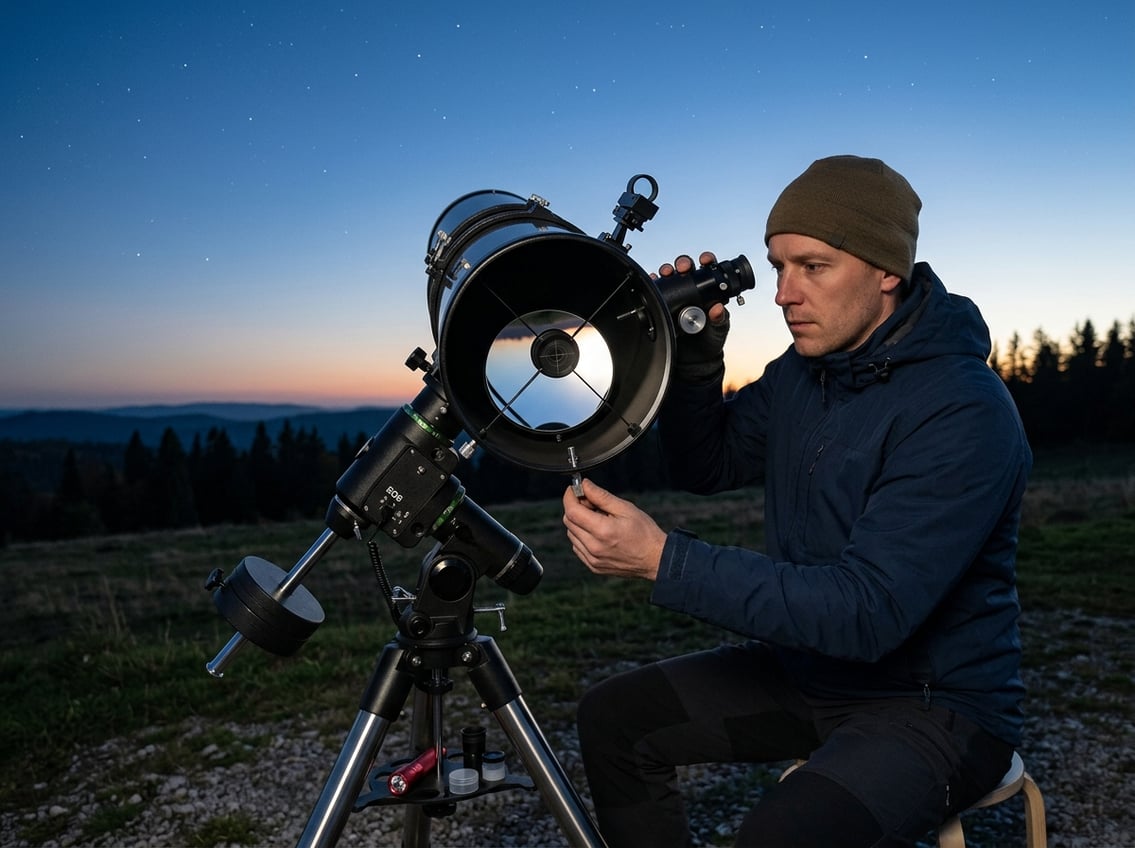
Your reflector telescope needs proper alignment to show you sharp, clear views of the night sky. Collimation is the process of aligning your telescope’s mirrors so that light travels correctly through the tube and reaches your eyepiece, and most reflector telescopes can be collimated in just a few minutes once you know the basic steps. Many beginners avoid reflector telescopes because collimation seems complicated, but it’s actually a simple skill you can master.
You don’t need expensive tools or technical expertise to collimate your reflector telescope. A basic collimation cap and a few adjustments to your primary and secondary mirrors will get your telescope performing at its best. Think of collimation like checking your car’s tire pressure – it’s regular maintenance that keeps everything running smoothly.
This guide walks you through everything you need to know about collimating your reflector telescope. You’ll learn which tools work best, how to adjust each mirror correctly, and when to check your alignment. By the end, you’ll have the confidence to collimate your scope quickly and get back to observing.
Last Updated: May 2026 | Will Montgomery is an amateur astronomer who collimated his first reflector telescope the hard way — and now does it in under five minutes.
Understanding Reflector Telescope Optics
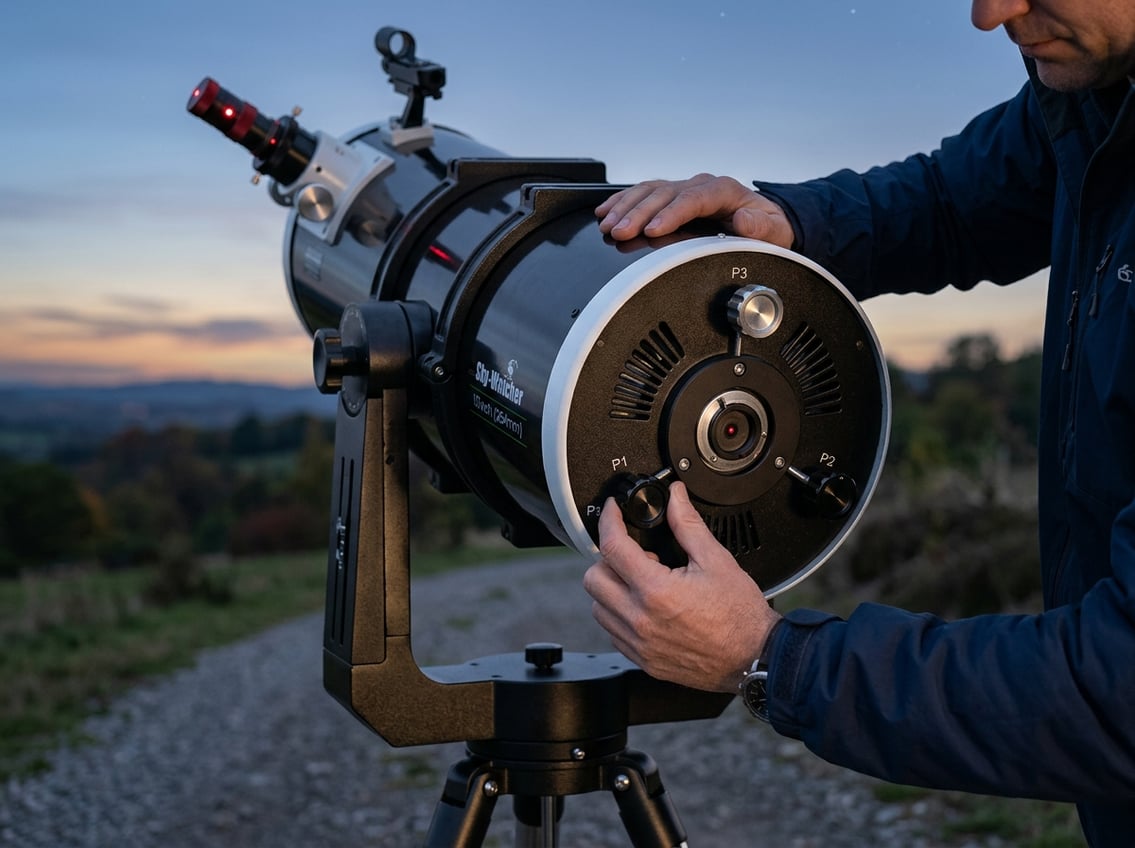
Reflector telescopes use mirrors instead of lenses to gather and focus light. The way these mirrors work together determines how well your telescope performs and why proper alignment matters.
Primary vs. Secondary Mirror Roles
The primary mirror sits at the bottom of your telescope tube. It’s the larger curved mirror that collects incoming light from stars and planets. This mirror reflects light back up the tube toward a focal point.
The secondary mirror is much smaller and sits near the top of the tube at an angle. It intercepts the light cone from the primary mirror before it reaches focus. The secondary then directs this light out to the side of the tube where your eyepiece sits.
These two mirrors must work as a team. The primary mirror does the heavy lifting by gathering light. The secondary mirror simply redirects that light to a convenient viewing position. Without the secondary mirror, you’d need to put your head inside the telescope tube to see anything.
How Mirror Alignment Affects Image Quality
When your mirrors are misaligned, light doesn’t converge at the right spot. Stars appear as blurry smudges instead of sharp points. You’ll notice fuzzy edges around planets and a general lack of detail.
Poor alignment reduces optical performance in predictable ways. Images lose contrast because light scatters instead of focusing properly. Fine details disappear even at high magnification.
The diffraction pattern around bright stars reveals collimation problems. A perfectly aligned telescope shows concentric rings around a defocused star. Misaligned optics create lopsided or elongated patterns that clearly indicate which direction you need to adjust your mirrors.
Common Types of Reflector Designs
Newtonian reflectors are the most common type. They have a parabolic primary mirror and a flat secondary mirror mounted on a spider. Newtonian and Dobsonian telescopes both use this basic design and need regular collimation.
Dobsonian telescopes are actually Newtonians mounted on a simple alt-azimuth base. The optical design is identical. These large-aperture scopes offer excellent light-gathering power at a low cost.
Each design has the same collimation requirements. The primary and secondary mirrors must align precisely regardless of the mounting style you choose.
Essential Tools and Preparation Steps
From experience: My original plan was to pick up a laser collimator — and I still recommend them. But living in Pennsylvania where the weather rarely cooperates, I end up grabbing the collimation cap most nights and it works just fine for a quick check before an observing session.
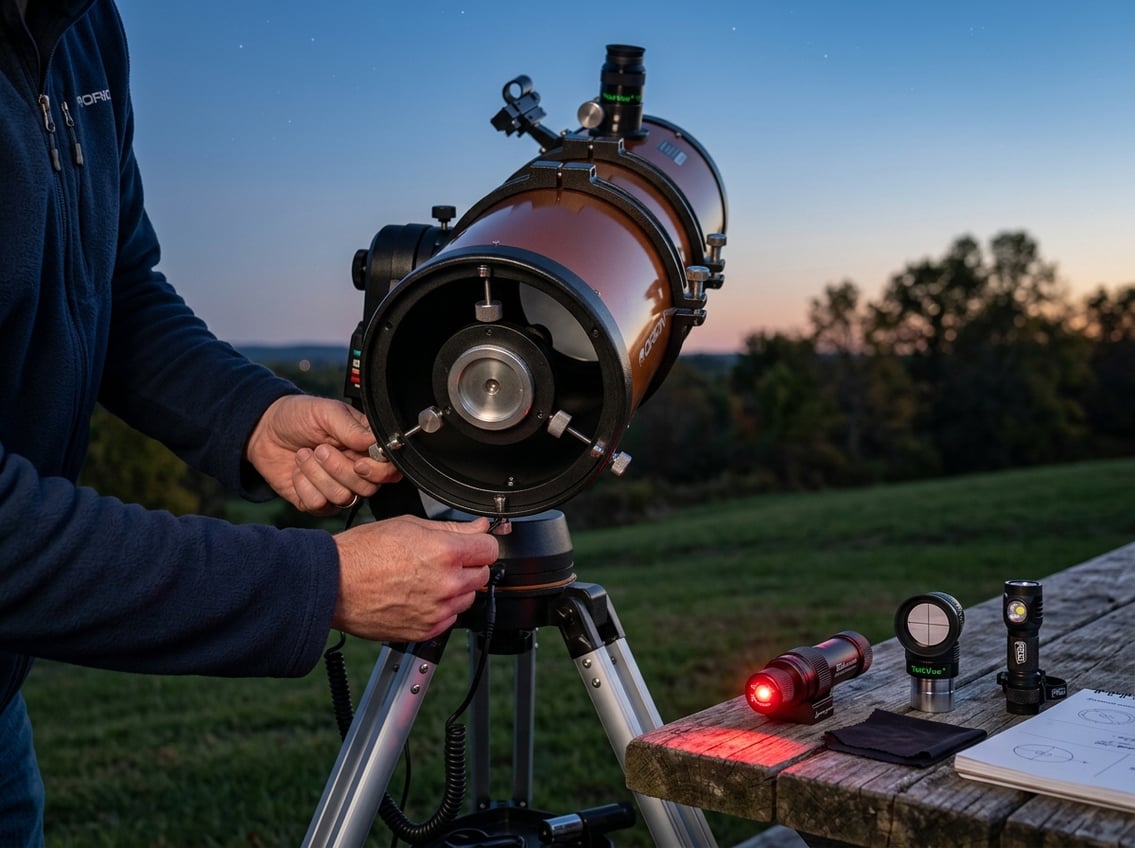
You need three basic types of tools to collimate your reflector telescope properly. Each tool serves a specific purpose in the alignment process, and having the right adjustment tools on hand prevents frustration during setup.
Collimation Caps and Cheshire Eyepieces
A collimation cap is a simple plastic or metal cylinder that fits into your focuser. It has a small peephole in the center that lets you look down the optical tube at your mirrors. This is the most basic collimation tool and often comes free with new telescopes.
A Cheshire eyepiece takes this concept further with a reflective pane that provides better visibility of your mirror alignment. Cheshire eyepieces use a reflective-pane design that gives you an unobstructed view without crosshairs blocking your sight.
The Cheshire works particularly well for the final primary mirror alignment. You insert it into the focuser just like a regular eyepiece and look through the peephole to see all your optical components at once.
These tools require no batteries and work in any lighting condition. They cost between $15 and $60 depending on quality and barrel size.
Laser Collimators and Their Benefits
A laser collimator projects a beam of light down your telescope tube to show exactly where your mirrors are pointing. The laser gives you instant visual feedback during adjustment.
Laser collimators are accurate for secondary mirror alignment and get your primary mirror close to perfect alignment quickly. High-quality models use an 8-screw alignment system and produce narrow beams around 0.76mm for precise readings.
You insert the laser into your focuser and turn it on. The beam reflects off both mirrors and shows up as a dot on the primary mirror. Your goal is to position this dot at the center mark.
Laser collimators cost between $40 and $150. They need batteries but make the collimation process much faster than sight-tube methods alone.
Gathering the Right Adjustment Tools
Your telescope’s secondary mirror holder uses three adjustment screws that you turn with either a Phillips screwdriver or an Allen key. Check which type your scope uses before starting.
The primary mirror sits in a cell at the bottom of the tube with three pairs of adjustment screws. These might require Phillips screwdrivers, flathead screwdrivers, or Allen keys depending on your telescope model.
Keep a small flashlight or headlamp nearby for seeing adjustment screws clearly. A step stool helps when working with tall Dobsonian telescopes.
Set your telescope on level ground or use wedges if needed because stability matters during adjustment. Work during daylight hours when you can see the mirrors and screws easily.
Step-By-Step Collimation Instructions
Collimating your reflector telescope involves three main tasks: checking if your mirrors are already aligned, positioning the secondary mirror correctly, and fine-tuning the primary mirror to achieve sharp views.
Checking Initial Alignment
Place your collimation cap in the focuser and look through the small hole. You’ll see several circular shapes: the edge of the focuser, the secondary mirror, the primary mirror, and the reflection of the secondary mirror in the primary.
Look for the small paper doughnut or center mark on your primary mirror. The reflection of the collimation cap’s peephole should appear as a small black dot. Check if this dot sits in the center of the paper doughnut marking.
If everything lines up concentrically, your telescope may already be collimated. Most times you’ll see the circles offset from each other. This tells you which adjustments you need to make.
Do this check in daylight when you’re learning. It’s much harder to see the details in darkness until you gain experience with the process.
Adjusting the Secondary Mirror
First, verify that the secondary mirror is positioned correctly along the length of the tube. Measure the distance from the top of the tube to the center of your focuser. The secondary mirror’s center should sit at the same distance from the top of the tube.
Next, check if the primary mirror appears centered within the secondary mirror’s reflection. Tape a piece of white paper behind the secondary mirror to make the edges easier to see.
If the primary isn’t centered, you’ll need to adjust the secondary’s tilt using the small screws or Allen bolts on its holder. Work with only two of the three adjustment screws at a time. Turn them slowly until the outer edge of the primary mirror becomes concentric with the outer edge of the secondary.
You won’t need to adjust this mirror often. Some telescopes go years without needing secondary mirror adjustments.
Aligning the Primary Mirror
Look through your collimation cap again and locate the small black dot reflection of the peephole on your primary mirror. Your goal is to center this dot within the paper doughnut marking on the primary mirror.
Turn the collimation knobs at the back of your telescope to adjust the primary mirror’s tilt. You only need to use two of the three knobs to get the dot centered.
Turn one knob and watch which direction the dot moves. If it moves toward the center of the doughnut, keep turning that knob. If it moves away, turn the other knob instead.
Make small adjustments and check your progress frequently. Within a minute or two, you should have the dot centered. Once centered, your telescope is collimated and ready to deliver sharp views of celestial objects.
Fine-Tuning Mirror Alignment for Best Results
After completing basic collimation steps, a star test reveals how well your mirrors are truly aligned and helps you make precise adjustments that your eye alone cannot detect. Observing diffraction patterns around a bright star lets you identify small alignment errors and correct them for the sharpest possible views.
Using a Star Test for Precision
Point your telescope at a moderately bright star in the sky. Use medium to high magnification, around 150x to 250x, to see the diffraction pattern clearly.
Focus on the star until it appears as a small, sharp point. Then rack the focuser slightly out of focus in both directions. You should see concentric rings around the central disk.
Compare what you see inside and outside of focus. The patterns should look identical on both sides if your mirrors are properly aligned. If the rings appear shifted or elongated in one direction, your primary mirror needs adjustment.
Make small turns to your primary mirror’s adjustment screws, checking the star pattern after each change. Turn one screw at a time by no more than a quarter turn. The goal is to center the diffraction rings around the star.
Wait a few minutes between adjustments for your telescope to settle. Temperature changes and vibrations affect what you see.
Tips for Achieving Perfect Concentric Circles
Work with two adjustment screws on your mirror cell rather than all three. Pick the two easiest to reach and leave the third one alone unless you run out of adjustment range.
Key alignment indicators:
- Symmetrical rings on both sides of focus
- Central star sits in the middle of all rings
- No dark wedges or uneven spacing
- Rings appear round, not oval
Use a star near the meridian for testing. Stars low on the horizon shimmer from atmospheric turbulence, which makes it hard to judge your collimation accuracy. Choose a star at least 30 degrees above the horizon.
Make your finest adjustments when the temperature has stabilized. Your telescope’s optics shift as metal parts expand or contract with temperature changes.
Collimation Frequency and Routine Maintenance
Reflector telescopes need collimation checks more often than refractors, especially after moving your telescope or experiencing temperature swings. Building a regular maintenance routine helps you catch alignment issues before they ruin your viewing sessions.
How Often to Collimate Based on Telescope Type
Newtonian reflectors require the most frequent attention because their mirrors shift easily from gravity and temperature changes. You should check alignment before each observing session if you move your telescope regularly.
Dobsonian telescopes, a type of Newtonian reflector, typically need collimation checks weekly if you observe frequently. The larger the mirror, the more sensitive it becomes to even small movements.
Daily observers should verify collimation every night before viewing. Weekend-only users can check alignment before each session. Occasional stargazers should collimate whenever they set up their telescope after storage.
Short focal ratio telescopes (f/5 or faster) show misalignment more obviously than longer focal ratios. These fast scopes need more precise alignment to deliver sharp images.
Impact of Transport and Temperature Changes
Moving your telescope can shift the mirrors out of alignment even with careful handling. Transport shifting risks occur from vibrations during transit, so always recheck collimation after moving your scope.
Temperature differences between storage and viewing locations cause metal components to expand or contract at different rates. This thermal expansion throws your optical system out of alignment.
Allow your telescope 30-60 minutes to reach outdoor temperature before collimating. Rushing this process means you’ll be aligning components that will shift as they continue cooling down.
Extreme weather changes require immediate collimation checks. Bringing a warm telescope into cold night air or setting up in direct sunlight creates rapid temperature shifts that misalign mirrors quickly.
Recommended Care Checklist
Before Each Session:
- Check collimation with a sight tube or laser
- Verify secondary mirror position
- Test star focus at medium magnification
After Transport:
- Allow thermal stabilization
- Perform full collimation sequence
- Star test to confirm alignment
Monthly Maintenance:
- Clean dust from mirror edges
- Check mounting bolts for proper tension
- Inspect collimation screws for wear
Store your telescope in a stable temperature environment to minimize thermal stress between sessions. Cover mirrors when not in use to prevent dust buildup that can affect alignment checks.
Keep a collimation log noting when you last aligned your scope and under what conditions. This helps you identify patterns in how often your specific telescope needs adjustment.
Troubleshooting Collimation Challenges
Even with careful adjustment, you may run into specific problems that make collimation difficult. Sticky screws, wobbly mirrors, and confusing reflections are common obstacles that can slow down the process or make alignment seem impossible.
Common Misalignment Issues
If you look through your collimation tool and see the secondary mirror shifted far off to one side, you need to adjust the center bolt on the spider vanes first. This bolt controls where the secondary sits in relation to the focuser. Loosen the three adjustment screws slightly, then turn the center bolt to move the secondary into position.
Stars that look like comets pointing toward one edge of the field mean your primary mirror is tilted in that direction. The fix involves turning the adjustment bolts on the opposite side of the mirror cell to tilt the primary back toward center.
When the defocused star test shows lopsided rings, make very small adjustments to the primary mirror bolts. Turn each bolt no more than a quarter turn at a time, then go back to the eyepiece to check your progress. Overcompensating makes the problem worse.
If everything looks centered through your collimation tool but the star test still shows asymmetric rings, your collimation tool itself might be seated improperly in the focuser. Remove it, rotate it, and reinsert it to see if the problem changes.
Dealing With Loose or Tight Screws
Adjustment screws that are too tight will resist movement and make fine-tuning impossible. If you cannot turn a screw with reasonable finger pressure, apply a small amount of lubricant like white lithium grease or PTFE spray to the threads. Let it sit for a few minutes, then try again.
Loose screws that turn without creating any movement indicate the tension is completely gone. You need to tighten the locking screws or springs behind the adjustment bolts to restore tension. Most Newtonian mirror cells use either push-pull bolt pairs or spring-loaded bolts with lock nuts.
For push-pull systems, tighten the pull bolts slightly to create resistance, then use the push bolts to make your adjustments. For spring-loaded systems, tighten the lock nuts until you feel moderate resistance when turning the adjustment bolts.
Never force a stuck screw. Stripped threads will make collimation impossible without replacing the entire mirror cell. If a bolt refuses to budge after lubrication, consult the telescope manufacturer for guidance.
Ensuring Stable Mirror and Cell Support
A primary mirror that shifts or tilts when you touch the telescope tube means the mirror clips are too loose. The clips should hold the mirror firmly against the cell without pinching it. Tighten them just enough to prevent movement.
Check for mirror rocking by gently pressing on the edge of the primary mirror through the front of the tube. Any movement means you need to adjust the clips or add support pads. The mirror should sit stable but not be clamped so tightly that temperature changes could crack it.
Collimation that drifts within minutes of adjustment often points to loose spider vanes or an unstable secondary holder. Tighten the screws that attach the spider vanes to the tube wall. Some scopes have a grub screw on the secondary holder that needs periodic tightening.
If your scope uses a curved-vane spider, make sure all four vanes have equal tension. Uneven tension twists the secondary holder and makes stable collimation impossible.
Optimizing Performance After Collimation
Proper collimation sets the foundation, but additional steps ensure you get the sharpest possible views. Temperature stabilization, optical cleanliness, and proper storage habits directly impact your telescope’s performance between observing sessions.
Improving Focusing and Image Sharpness
Allow your telescope to reach thermal equilibrium before expecting peak performance. Temperature differences between your mirrors and the surrounding air create turbulence inside the tube that blurs your images.
Set up your telescope 15 to 30 minutes before observing. Larger mirrors need more time to stabilize. An 8-inch mirror might need 20 minutes, while a 12-inch mirror could require 45 minutes or more.
Check your collimation after your telescope reaches temperature. Cooling can cause slight shifts in mirror alignment. A quick verification with your collimation tool takes only a minute and ensures optimal results.
Use a high-quality eyepiece for planetary viewing. Even perfectly collimated optics won’t overcome poor eyepiece quality. Start with medium magnification and increase gradually to find the best balance between size and clarity.
Cleaning and Protecting Optics
Keep your mirrors clean to maintain light transmission and contrast. Dust and debris scatter light and reduce image sharpness. However, cleaning too often causes more harm than good.
Only clean mirrors when you notice a visible coating of dust or spots. A few specks won’t affect your views. When cleaning is necessary, use compressed air first to remove loose particles.
For stubborn dirt, use distilled water and a drop of mild dish soap. Apply the solution gently with cotton balls, working from the center outward in straight lines. Never rub in circles. Rinse thoroughly with distilled water and allow the mirror to air dry at an angle.
Replace your dust cap immediately after each observing session. This simple habit prevents most cleaning needs. Store your eyepieces in protective cases rather than leaving them exposed.
Storing Your Telescope Safely
Store your telescope in a stable environment to maintain collimation between uses. Temperature swings and humidity cause components to expand and contract at different rates.
Keep your telescope indoors when possible. A closet or spare room works better than a garage or shed. Avoid locations near heating vents or windows where temperature changes rapidly.
Store the telescope upright or with the tube horizontal. Never leave it pointed straight down for extended periods, as this can stress the primary mirror cell. Remove heavy eyepieces from the focuser to prevent drawtube sag.
Cover the tube openings with caps or breathable fabric. Solid caps work well for short-term storage, but for long periods, use breathable covers that allow moisture to escape while keeping dust out.
As a manufacturing engineer, aligning optics is right in my wheelhouse, so I make collimation approachable and quick.
These May Help Too...
Can You Use a Telescope Through a Window? (And Why You Should Not)
Using a telescope through a window ruins the view: bad glass, heat currents and reflections. Here is what actually happens, and what to do instead.
Telescope will not come to focus? The cause is almost always spacing, not optics. Work out whether you ran out racking in or out, then fix that end.